Introduction to Loxone
The world of home automation has rapidly evolved over the last decade, creating opportunities for homeowners to enhance their living environments with smart technologies. Among the various options available, Loxone stands out as a comprehensive solution that allows for extensive automation in residential spaces. This article serves as a detailed guide for beginners looking to set up their own Loxone smart home, covering all essential aspects from understanding the technology to practical installation steps.
Overview of Loxone Technology
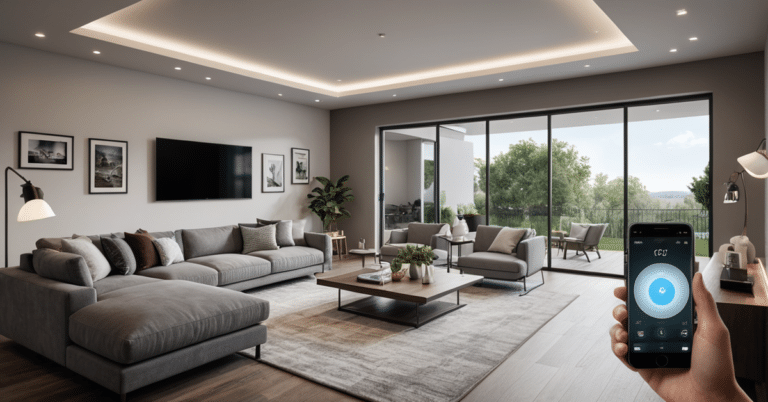
Loxone is a leading provider of smart home technology, offering a robust ecosystem designed for automation and energy management. At the heart of the Loxone system is the Miniserver, which acts as the central control unit, enabling communication between various devices within the home. Loxone’s technology is versatile, supporting not only lighting and heating controls but also security systems and multimedia applications. This flexibility allows users to create a tailored environment that meets their specific needs and preferences.
The platform is designed with both functionality and user experience in mind, featuring an intuitive app that allows homeowners to monitor and manage their systems easily. With Loxone, users can automate everyday tasks such as adjusting lighting based on occupancy, managing indoor temperatures, and controlling blinds or shutters, all contributing to a more convenient and energy-efficient home.
Benefits of a Smart Home with Loxone
Investing in a Loxone smart home brings several advantages. Firstly, it enhances convenience; users can control multiple devices from a single interface, reducing the need for multiple remotes or switches. This centralized control can be especially beneficial for families with various schedules, ensuring that home management is seamless regardless of the occupants’ activities.
Another significant benefit is energy efficiency. Loxone systems allow for precise control over energy-consuming devices, which can lead to significant savings on utility bills. For example, automated lighting can ensure that lights are only on when needed, and intelligent heating systems can adjust temperatures based on occupancy, ensuring comfort without excess energy use.
Understanding the Loxone Ecosystem
The Loxone ecosystem comprises a range of products designed to work together harmoniously. At the center is the Miniserver, which connects to various sensors and actuators throughout the home. Sensors can detect motion, light levels, and temperature, while actuators control devices like lights, heating, and blinds. Together, these components create a dynamic environment that responds to the homeowner’s needs.
Moreover, Loxone integrates with a variety of third-party devices, enabling users to expand their system as new technologies become available. This interoperability is crucial for those looking to future-proof their homes, as it allows for continual upgrades and enhancements without the need for a complete overhaul of the existing system.
Essential Components for Setup
Key Devices Required for Loxone
To set up a Loxone smart home, several critical devices are necessary. The primary component is the Loxone Miniserver, which serves as the central hub for the entire system. Alongside the Miniserver, users will need a selection of sensors, such as motion sensors for lighting and temperature sensors for climate control. Actuators, which control devices like lights and heating systems, are equally important for a complete setup.
Other essential components include the Loxone App, which provides remote control capabilities, and various input and output devices that enable user interaction with the system. Homeowners may also consider additional modules for specialized functions, such as a music server for audio control or a weather station for climate monitoring.

Choosing the Right Loxone Products
When selecting Loxone products, it is essential to consider the specific needs and layout of the home. Each product is designed for particular functions, so homeowners should assess which areas they want to automate. For instance, if the primary focus is on energy management, investing in smart thermostats and energy monitoring devices would be a priority. Alternatively, those seeking enhanced security might prioritize motion detectors and surveillance systems.
Another factor to consider is the scalability of the system. Homeowners should choose products that allow for future expansion, ensuring that additional devices can be seamlessly integrated without significant reconfiguration.
Understanding Compatibility and Integration
Compatibility is crucial when setting up a Loxone smart home, especially for those looking to integrate multiple technologies. Loxone is designed to work with various third-party products, but it is essential to verify compatibility before purchasing additional devices. This can include smart bulbs, cameras, and other automation devices that enhance the overall functionality of the home.
Moreover, understanding the available protocols and standards (such as Z-Wave or Zigbee) used by different devices can help ensure smooth integration. Homeowners should refer to Loxone’s compatibility guides to make informed decisions that will ultimately lead to a more synchronized and efficient smart home ecosystem.
Step-by-Step Installation Guide
Preparing Your Home for Installation
Before installation begins, it is crucial to prepare the home thoroughly. Homeowners should conduct a walkthrough to identify the areas where automation will be implemented, such as living rooms, kitchens, and bedrooms. This assessment will help in determining the number of sensors and actuators required and where they will be placed for optimal performance.
It is also advisable to create a wiring plan that outlines where cables will run for power and data connections. This preparation will make the installation process smoother, reducing the need for retrofitting or extensive wall modifications later on.
Installing Loxone Miniserver
The installation of the Loxone Miniserver is a critical step in the setup process. It should be placed in a central location within the home to ensure optimal communication with all connected devices. Follow the manufacturer’s guidelines for mounting the Miniserver safely, ensuring it is in a ventilated area to prevent overheating.
Next, connect the Miniserver to the home network using an Ethernet cable. This connection is essential for remote access via the Loxone App and for communication with cloud services. Once connected, power on the device and wait for it to initialize before proceeding with additional installations.
Connecting Sensors and Actuators
With the Miniserver installed and running, the next step is to connect the various sensors and actuators. Each sensor should be placed in a location where it can accurately capture the desired data, such as motion detectors near entryways or temperature sensors in living areas. Once positioned, sensors can be paired with the Miniserver through the app or by following the installation instructions provided.
Actuators should be connected to their respective devices, such as lights or heating systems. Ensure that wiring is completed according to safety standards, as improper connections can lead to malfunction or damage. After connecting, test each actuator to confirm that it responds correctly to commands from the Miniserver.
Wiring and Network Setup
The final step in the installation process involves setting up the wiring and network connections for all devices. This includes both power supply and data connections, which are vital for the entire system to function correctly. Homeowners should adhere to electrical codes and ensure that all wiring is neatly organized to prevent confusion during troubleshooting or future upgrades.
Once wiring is complete, conduct a network test to ensure that all devices are communicating with the Miniserver. This critical step is essential for a successful installation, as it verifies the integrity of the connections and the functionality of the smart home system.
Configuring the Loxone App
Downloading and Setting Up the Loxone App
The Loxone App is a vital component of the smart home experience, providing users with the ability to control their devices remotely. The app is available for both iOS and Android devices, and downloading it is the first step toward full control of the Loxone system. Once the app is installed, users must create an account and log in to connect to their Miniserver.
During the initial setup, the app will prompt users to enter details about their home network and the Miniserver. This process ensures that the app can communicate effectively with the device and allows for remote access from outside the home. Users should follow the prompts carefully to complete the setup successfully.
Creating User Profiles and Permissions
One of the app’s strengths is its ability to support multiple user profiles, enabling different family members to access and control the smart home system. Admins can create profiles with specific permissions, determining which devices and settings each user can access. This feature is particularly useful for households with children or guests, as it allows for tailored access without compromising security.
When configuring user profiles, consider the roles and responsibilities of each user. For instance, parents might have full control over the lighting and heating, while children may only have access to certain features. Establishing these permissions helps maintain an organized and secure smart home environment.
Customizing Settings for Optimal Performance
After setting up user profiles, users can begin customizing the app settings to enhance their experience. This includes adjusting notifications, setting up automated routines, and creating custom scenes that allow multiple devices to be controlled simultaneously. For instance, a movie night scene could dim the lights, close the blinds, and adjust the heating for optimal comfort.
Furthermore, users should periodically review and optimize settings to ensure the system remains efficient and meets their needs as lifestyles change. Regular updates to both the app and the Miniserver firmware are recommended to take advantage of new features and improvements.
Common Troubleshooting Tips
Identifying Common Issues
Even with a well-planned setup, homeowners may encounter issues with their Loxone smart home system. Common problems include connectivity issues, device malfunctions, or failure to respond to commands. Identifying the root cause of these issues is crucial for effective troubleshooting.
Start by checking the physical connections of devices and ensuring that the Miniserver is powered on and connected to the network. If issues persist, users can refer to the app for detailed diagnostics that may help pinpoint the problem.
Resolving Connectivity Problems
If the system experiences connectivity issues, a few steps can help resolve them. First, ensure that the Miniserver is within range of the home network’s router. If necessary, consider relocating the Miniserver or upgrading to a more powerful router to enhance signal strength.
Additionally, users should check for interference from other electronic devices that may disrupt the wireless signal. Changing the router’s channel or frequency band can often improve connectivity. If all else fails, restarting the Miniserver and the router can sometimes resolve lingering connection issues.
Updating Firmware and Software
Keeping the Loxone system updated is vital for maintaining its functionality and security. Software updates often include new features, bug fixes, and security enhancements. Users should regularly check for updates within the Loxone App and follow the prompts to install them.
It is also advisable to review the firmware updates for all connected devices, ensuring that they are running the latest versions. This practice will help prevent compatibility issues and enhance the overall performance of the smart home system.
Enhancing Home Automation Features
Integrating Additional Smart Devices
Once the basic Loxone setup is complete, homeowners can further enhance their smart home experience by integrating additional devices. From smart speakers and security cameras to smart plugs and home entertainment systems, the options are vast. However, it is essential to verify that any new devices are compatible with the Loxone ecosystem before purchase.
Adding smart devices not only increases functionality but can also improve energy efficiency and home security. For example, smart plugs can monitor energy usage and automate devices like coffee makers or lamps. Integrating these devices with Loxone allows users to control everything from one interface, streamlining their home automation experience.
Scheduling and Automation Options
Loxone’s automation capabilities are one of its standout features. Users can set schedules for various devices, creating routines that enhance daily life. For instance, homeowners can program lights to turn on at sunset or set the heating to adjust according to their morning routine.
Automation can also be triggered by certain events, such as motion detection or specific temperature readings. This level of customization ensures that the smart home not only reacts to user commands but also proactively enhances comfort and security based on real-time data.
Exploring Advanced Features of Loxone
Beyond the basic functionalities, Loxone offers advanced features that can significantly enhance the smart home experience. These include features like geo-fencing, where the system can automate actions based on the homeowner’s location, such as turning off lights or locking doors when everyone leaves the house.
Additionally, users can explore integrating voice control options with devices like Amazon Alexa or Google Assistant, allowing for hands-free management of their smart home. The Loxone system’s flexibility ensures that as technology evolves, homeowners can adapt and expand their systems to take full advantage of new innovations.
Conclusion
Setting up a Loxone smart home can seem daunting at first, but with the right preparation and understanding of the system, it can be a rewarding endeavor. From selecting the right components to troubleshooting common issues, this guide provides a comprehensive overview of the essentials needed for a successful installation and configuration. By embracing the Loxone ecosystem, homeowners can enjoy increased convenience, energy efficiency, and a customized living environment that adapts to their needs.
FAQs
What is Loxone, and how does it work?
Loxone is a smart home technology provider that offers a comprehensive ecosystem for home automation. It consists of a central Miniserver that connects with various sensors, actuators, and devices, allowing users to automate and control their home environment through an intuitive app.
Do I need special tools for installation?
Basic tools such as screwdrivers, wire strippers, and a drill may be required for installation. Additionally, depending on the complexity of the setup, homeowners may need specialized tools for advanced wiring or network configuration.
Can I integrate Loxone with other smart home devices?
Yes, Loxone is designed to integrate with various third-party devices. However, it is important to check compatibility before purchasing additional products to ensure seamless integration into the existing system.
Is it possible to control Loxone remotely?
Yes, Loxone can be controlled remotely via the Loxone App, allowing users to manage their devices from anywhere with an internet connection. This feature enhances convenience and security for homeowners.
How can I improve my Loxone system’s performance?
Regularly updating the app and device firmware, optimizing device placements, and ensuring a strong network signal are key ways to enhance the performance of your Loxone smart home system.